Wednesday 21 February 2018

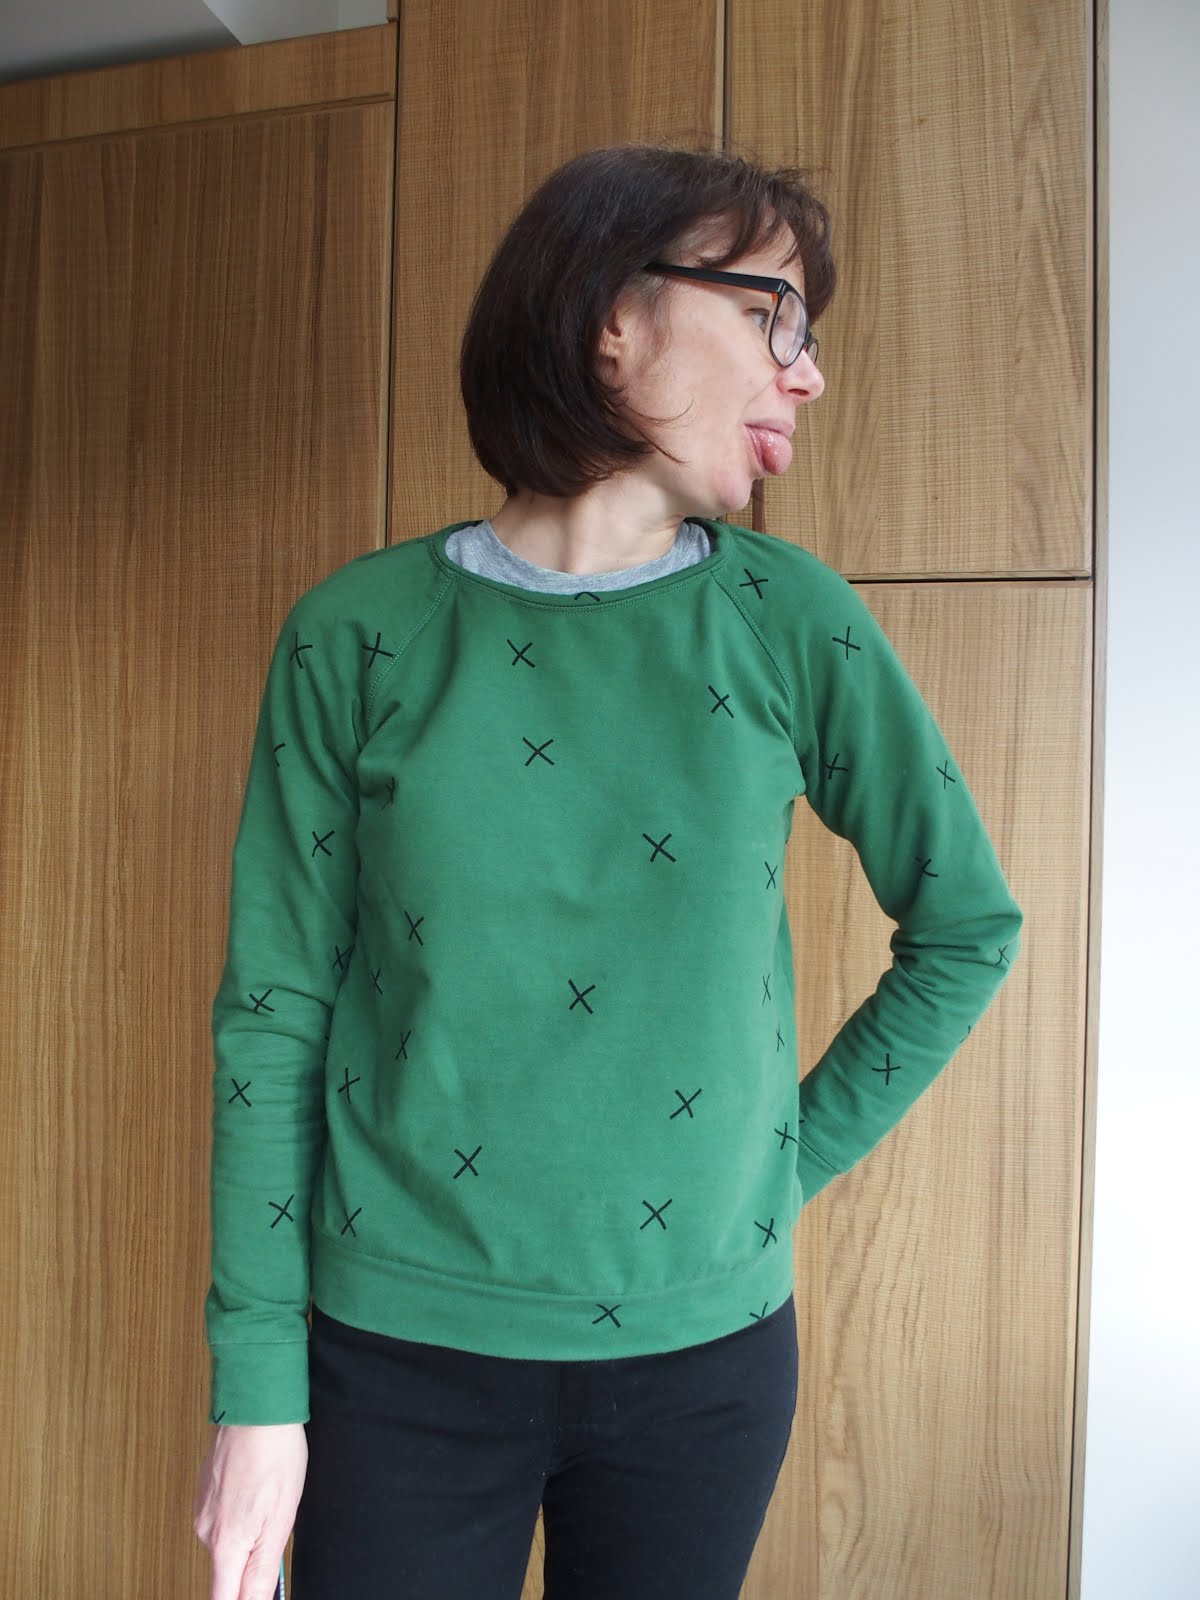
Completed: Astoria Sweatshirt (Hacked)

This is the Seamwork Astoria sweater. It's the first Seamwork pattern i've made, despite having had a subscription for the first year it launched. I'll be honest, I'm not that fussed about most of the patterns. There have been a few I've quite liked, but never quite enough to actually prioritise the sewing of them, but I always did quite like the Astoria.


There were a few things that slightly put me off making it previously. It's both very fitted and very cropped and I just am not overly comfortable with things being very tight over my stomach or bust. I did like the neckline though, and as I was recently in the market for a slightly more smart/dressy top for work, and I wanted a sweatshirt, I thought the Astoria would be a good starting point.

I sized up. My bust size put me at an XS, but I went with the finished measurements, opting to make a S instead. I had a quick chat with Christine who has made a few of these before, and, at her suggestion, took out the waist shaping, straightening the pattern from bust down to hip. This widened the hip, so I checked by how much, and added that onto the width of the waistband, also taking the shaping out of that. I also added 6cm to the length at the lengthen/shorten lines.


As a last hack, to make it a bit dressier still, I added a ruffle cuff to the sleeve, a little detail I'd spotted on a RTW jumper.

I'm fairly happy with how this worked out and I like the resultant shape. It's fitted, but not tight over the bust, and then more relaxed over my waist. It's still fairly short for a sweatshirt, but perfect for me over high waisted bottoms. I do find the sleeves to be very tight below the elbow, particularly when bearing in mind that I sized up. If I made this again, I'd add a bit of width to the bottom half of the sleeve, but really my fabric probably didn't have quite as much stretch as the pattern asks for. Initially, I made the sleeves too long. I removed the inch hem allowance and took a further 3/8 inch SA to attach the ruffle cuff, but they are still too long, so I went back and removed the first ruffle cuff, cut more length off (can't remember how much, sorry), and cut and sewed another ruffle cuff. Unfortunately, I cut the second cuff the same width, but clearly the sleeve is wider since sleeves narrow to the wrist, so now the ruffle is less pronounced, and I think looks a bit daft. Not sure I can be bothered to do it again though. I topstitched the SA on the ruffle cuff to the sleeve as the first iteration has a tendency to flip out, and this has helped.

I think the shoulders are a little big, probably a result of sizing up. It doesn't bother me, but if I do make this again, I think I'll shave a little off the armscye.


Finally, let's talk about the neckband. So, I always baste my neckbands (and collar and sleeve bands for that matter). I really struggle with stretching to fit, plus working round pins, plus curling knit fabric edges, so I tend to baste, check and remove puckers etc, then sew in place. This time I decided not to. And I sewed the neckband on with raw edges to the outside. Gah! I spent a good few hours unpicking it (black thread, black fabric, teeny tiny lightening bolt stitch), making at least one hole in the process... only to then sew it on the wrong way round the second time! So, the neckband joining seam is at the front. I wasn't unpicking it again. I'd already made one hole (I sewed the neckband on the second time with a bigger SA to compensate), and I wasn't about to try that again. And actually it doesn't bother me in the slightest. I don't think you really see it when it's on, and if anyone asks, it's a design detail!

The fabric is the black loop back terry from Splendid Stitch, which is currently out of stock unfortunately. It's a really nice fabric actually. Cotton with elastane, which a lot of french terry doesn't have. The loops are not very obvious on the wrong side, and the right side has a lovely smooth face. It's a decent weight and the elastane means it has good recovery, so it would be good for some joggers or something similar. I wish she had it in lots more colours!

True fact - I have only just realised that I appear to have cut this out on the cross grain. The rib of the fabric in these photos very clearly runs horizontally. D'oh!

Final verdict - this isn't my favourite sweatshirt pattern, but I do like it. I think it'll work well in a work context with midi skirts and boots, and you can never go amiss with a black top. I wore it a few times over the Christmas period, with my silver pleated velvet midi skirt and also black jeans. It dresses up nicely with some jewellery or down with jeans and trainers. Very versatile, so I should get lots of wear out of it.
SHARE:

Saturday 17 February 2018

Completed: Silver pleated velvet skirt!

There really isn't too much to say about this skirt, other than isn't it fabulous?!
My phone is my camera remote, and it kept disconnecting, which is why I am constantly looking at my phone in these photos!


I really wasn't going to make a Christmas party outfit this year, but I kind of fell in love with the pleated velvet from the Fabric Godmother. I loved the olive colour, but it sold out pretty quickly. Luckily Josie then got the silver in stock (now sold out, but the taupe is in the sale!).

Because my brain was not engaged, I thought one metre wouldn't be enough, so ordered 2. I knew I wanted at least 1.5m width in the skirt and as I was making this on the cross grain, I thought 1m wouldn't work, but I completely forgot that I could have cut the fabric down the length to make 2 widths, and this never even clicked until I cut the fabric out! Ah well. Doing it this way meant I only had one side seam to sew. The waistband is wide black elastic attached to the selvedge, so that the elastic is exposed, and the skirt is unhemmed. It took less than an hour from start to finish.


It's really too long in it's current state. I have worn it a few times as is, but I think I'll get more wear if it's a bit shorter, although I still plan to keep it well below knee length. The elastic is also slightly on the tight side. I generally seem to make skirt waistbands too large, even when elasticated, so I slightly overcompensated with this one. I might cut it off and sew a longer length on, which also might resolve the length issue and is why I haven't done anything about it yet... We will see. In the meantime, I have a lovely slightly sparkly, swishy, tactile skirt that goes with pretty much everything! Hurrah!

SHARE:

Wednesday 14 February 2018

Completed: Chat Chocolat Linden


I decided a wee while back that I really wanted a dark green sweatshirt for this winter. I’ve been meaning to make the Linden again for a while – my ampersand version is literally my most worn piece of clothing, handmade or shop bought – but I’m a bit picky about fabrics and colours for sweatshirts, plus I was worried that a solid coloured version might be a bit dull. I can’t remember how I got onto them, but somehow I came across Chat Chocolat’s website and signed up to their newsletter, thinking they sold fabric directly to the public in the manner of Atelier Brunette. When they emailed their newsletter featuring their new collection, We're All Stars, I immediately fell for the forest green version. As it turns out, they only sell wholesale, but they have one UK supplier in the form of Faberwood, which of course, I had known all the time because I’ve seen their fabric on Fiona’s website before. So… being a bit cheeky, I DM’d Fiona to ask if she was considering stocking it. She wasn’t even aware of it, but because she is so lovely and has such fabulous taste, she very quickly got in touch when them and within a matter of weeks, had it on the website, alongside the solid green, should crosses not be your thing.


I am going to rave about this fabric, because, well it’s fabulous and also because I would feel guilty in the unlikely event that Fiona doesn’t shift the rest (she did and has since restocked it!). It’s a very stable sweatshirting with a lovely, cosy, fleecy back. It doesn’t have a lot of stretch, something I didn’t really consider, and is less drapey than say, the Atelier Brunette sweatshirting, although isn’t much thicker. The colour is a glorious forest green, deeply saturated and gorgeous.

I made a Linden, as originally planned, but with a couple of changes. I sewed the size 4, but used a ½” seam allowance everywhere, except the sleeves due to the lack of stretch in the fabric – initially I sewed them at ½” too, but they felt too tight, and I want to be able to layer other things under this. For info, the given SA is ¼” which is what I ultimately sewed the sleeve seams with. I added darts in the shoulders to fix the gaping there – this is a feature I quite like in my ampersand version, but with the smaller SA, it’s made the neckline smaller and the darts don’t sit that well unfortunately. I think I used slightly more than a ½” SA to attach the neck binding, because I wanted it narrower. All this has meant the sweatshirt is approx. one size smaller than the cut size, which was my goal. A lazy version of sizing down. It is tighter than my others, but it’s very comfortable.
It was all sewn on my sewing machine with the lightening bolt stitch and the edges were left raw although they were trimmed slightly to reduce bulk.


And that was it! I’d forgotten how quick sweatshirts are to make, but I’d also forgotten how much I hate attaching neck/hemband and cuffs. Man, I detest attaching those things. I always feel like I need at least one extra pair of hands, and as always basted before sewing them properly. Kudos to anyone to can attach them directly with their overlockers. I have no idea how anyone could do that!

Having now worn this a few times there are a few things I want to go back and fix. The darts bug me, so need altering and actually I'm not happy with the narrower neckband at all. I think it was fine until I washed it, and the raw edges have since curled, which means the neckband just doesn't sit right. I think I will go back and cut off the neckband and attach a new one with the correct SA. None of this has stopped me wearing it non-stop though. It's cosier than my ampersand version, so better suited to the winter weather, plus I just love the colour!
SHARE:

Sunday 11 February 2018

Completed: Safran Jeans

I have 4 posts written in drafts, but I just haven't managed to get photos of anything recently. I put that right today with a major blog photo shoot, photographing 5 things in one session! The photos aren't the best, but they'll do!

Let's jump ahead with this, the most recent of makes: Deer and Doe Safran Jeans. My winter sewing has been practical but boring and this is no different. I am in desperate need of trousers for work. In recent years I've worn a lot more dresses and skirts during the winter, but this year I just haven't felt like dressing like that. For work, I've been living in my one pair of RTW black trousers, which are starting to suffer a bit. I had been planning to make a pair of black Gingers, when someone blogged about the Safrans. I had obviously seen them before, but this time around the welt pockets at the front caught my eye. I liked that they were a little less "jeansy", but equally would work as casual wear. To make them even less "jeansy", I made them in some stretch cotton twill.

I started these back at a #sewscottish meet up in November, when I sewed the whole front together, including fly and welt pockets and then they languished in the cupboard for ages afterwards until I had a day off in Jan that I could dedicate to fitting them. I initially had some reservations due to the fact that I am not the curvy shape that Deer and Doe appear to design for, but actually the fitting was very different to what I anticipated.

First things first, I cut the size 38 grading up to the 40 at the waist as per the sizing on the pattern and the finished garment measurements. This was actually my first Deer and Doe pattern, and I found the instructions to be OK, definitely not for beginners but good enough with a bit of experience under your belt. I loved the welt pockets although my second is better as I had figured out what I was doing by then. I read through both the D&D and the Closet Case Files instructions for the fly (from the Ginger jeans, a pattern I already own) and went with the latter which felt clearer and more intuitive. This meant changing the construction order a bit, but I managed to figure it all out.


I basted the crotch and side seams and got down to fitting. There was quite a lot to fix, as it turns out. I had to take a huge amount out of the waist. In the end, I took 14cm (yep, that's 5.5") out of the waist in the back and side seams and I also added darts. The Safran doesn't have a yoke and isn't darted, instead relying on negative ease for a fit. I was sceptical of this at the start and I remain so. The pattern calls for fabric with 20% stretch, and mine had that, but there was no way I was going to get these to fit without adding darts, and I'm not the curviest of people (my waist is 28/29" and my hips are 36" for reference).

I have pretty large calves and I have thighs, which is often an issue in RTW, and this pattern was no different. I let out the calves a bit at the side and inseams (not officially the correct way to do it - theoretically you should add more to the back and not change the front leg), which isn't perfect but has helped. I then moved onto the knees which had quite a lot of excess fabric gathering. I can't figure out if the knees is down to the fabric gathering because the trouser legs can't slide down over my giant calves, if it's to do with my knock knees, or if the pattern is just truly too big at the knees. In the end, I just took the side seams in a bit here (I have some really interesting S shaped side seams going on now) and called it a day. The knees still have some excess fabric, but by this point my fitting enthusiasm was waning somewhat.

Check out that side seam on the left, it's wandering about all over the place!

You can see the excess at the knees here. And a bit of pulling at the fly which I hadn't previously noticed.
The crotch isn't too bad. There are some drag lines at the front which *may* indicate I could with scooping out the front crotch curve a bit, but it's not a biggie and with the fly already done I was limited here. The back has a lot of drag lines immediately under my bum and the legs feel very tight at the back of my thighs. Not sure what to do here, but by then I was just fed up of fitting. I can't see my back anyway and in black fabric the drag lines don't show up too much. Fitting fatigue is a thing, and actually now that I look at these photos, the back actually looks fine!


The waistband proved a challenge. For some reason I decided to fit without the waistband on, and when I subsequently tried to apply the same changes to the waistband it was far too small. At this point the jeans went back in the cupboard again and Instagram was duly consulted. After a bit of advice and a bit of distance, I went back to them. I suspect there are numerous reasons why the waistband didn't work. Firstly, the waist more than likely stretched out with all the trying on I was doing. Secondly, I totally forgot that I shifted the side seams on the jeans to counter all the excess that I'd taken out of the garment at the back, and I didn't do the same to the waistband. Thirdly, I was treating a curved waistband like a straight one and was taking the same out of the top as the bottom of the waistband. Trial and error and a couple of versions later and I had a waistband that fitted well enough.


I'm really happy with these. They are *far* from perfect but at least they fit on the waist, which RTW never, ever do. They are comfy. Not lounge on the sofa comfy, as the fabric doesn't quite stretch enough for that, but they are definitely comfy for sitting at a desk for long periods of time. The legs ride up over my calves and don't slide back down, and there is still loads of excess fabric at the knees, but I like them nonetheless. I love the welt pockets and am super proud of both them and the fly. I missed the blogger-memo about recommending a stretch woven for the pocket linings and just made them in a standard bird print cotton (from Franca). This hasn't caused me any issues, but then again, the fabric's not stretching massively around my hips. Definitely one to consider if you are better endowed than I in that area. I made a mixture of version A and B: I omitted the belt loops, but kept the back pockets and cut them at ankle length to wear with ankle boots. Unfortunately the fabric is a fluff magnet, as twill always seems to be. It also feels a little rough against my skin. Not sure why. The fabric was one recommended on the D&D website and also came from France, from a seller called Mamzelle Fourni, (they don't seem to have it any more).

I don't know that I'd rush to make this pattern again. I'd like to try the Ginger jeans next, just to see how the fit compares, however I would love to incorporate the welt pockets into a future pair of jeans, even if it ends up being a mash up of patterns. But I will make jeans again, and I'll wear the hell out of these Safrans in the meantime!

SHARE:
© Grosgrain Green | All rights reserved.
Blogger Template Created by pipdig